Take Product Photos for an Online Clothing Store Using AI
Learn how to turn simple flat lays and mannequin shots into professional model catalogue photos without renting a studio.
 DevForge Studio
6 min read
Why Skip the Traditional Studio Shoot?
Running a clothing boutique is brutal work. Figuring out studio lighting shouldn't be on your to-do list. Bad photos mean zero sales.
Customers need to see how a saree, kurti, or western dress actually hangs on a real person before they buy. But booking models, renting studio space, and paying photographers drains your budget fast.
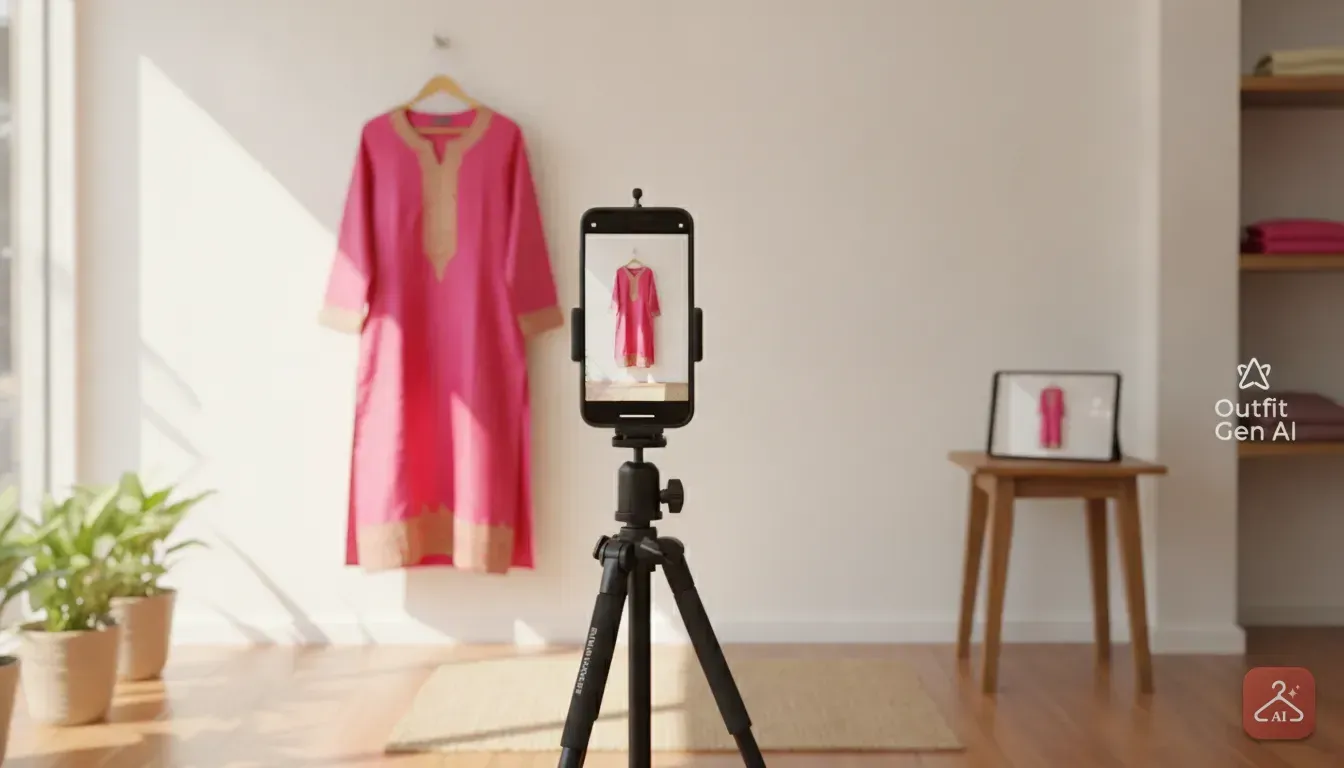
You can skip those heavy costs. By learning how to take product photos for an online clothing store using AI models, you just need a smartphone, your stock, and a clear wall. We've found that a simple base photo of your garment is enough for AI to generate a realistic image of a model wearing it.
Traditional photoshoots take weeks to plan. You have to match schedules, steam everything in a panic, and wait days for edits. That delay means you can't list new arrivals while they're hot.
AI puts you in total control. Get ten new lehengas on Tuesday, photograph them in your living room, and list them by Wednesday morning. You'll save thousands of rupees per batch and keep your store fresh.
Step 1: Prepare Your Garments Perfectly
The AI needs a solid starting point. Feed it a photo of a wrinkled shirt, and it spits out a model wearing exactly that. Preparation is everything.
- Steam or iron everything: Pay special attention to collars, hemlines, and sleeves. These little details show the true quality of your product.
- Remove stray threads and lint: Keep a sticky lint roller handy. Dark fabrics like black velvet or navy cotton pick up dust constantly in our studio.
- Stuff the garment: If you're laying clothes flat, put tissue paper inside the chest and shoulders. This gives the fabric a 3D shape and helps the software read the natural drape.
Step 2: Choose Between a Flat Lay or a Mannequin
Decide how to present the clothes for your base photo. Both flat lays and mannequins work well, but they need different setups.
The Flat Lay Method: Lay a white bedsheet or poster board on the floor. Arrange the outfit to mimic a body. Pull the sleeves down at a slight angle.
For sarees, fold the pleats neatly and arrange the pallu to show the border. Always check that the waist of a skirt lines up properly with the top.
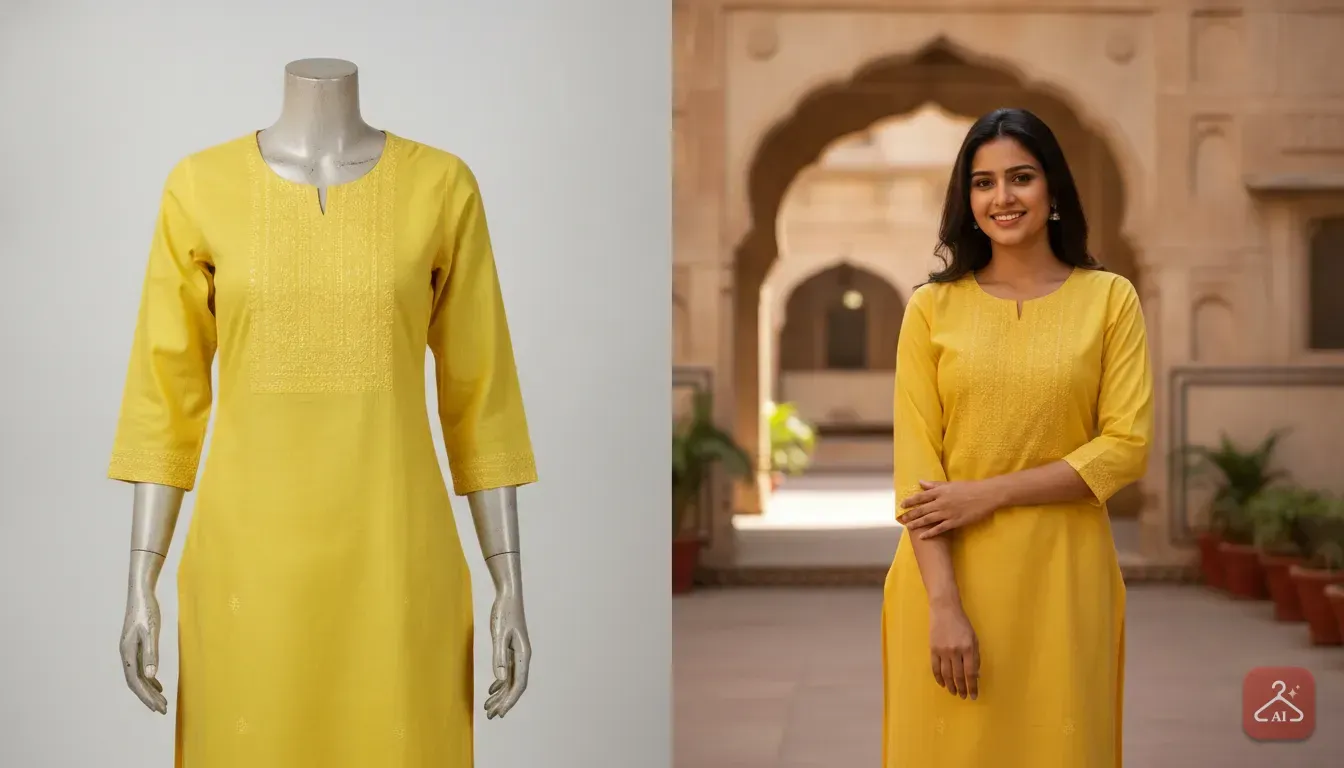
The Mannequin Method: A cheap plastic mannequin often gives us the best results because it provides real human shape. Pin any loose fabric at the back so the outfit looks tailored. When the AI replaces the plastic with a lifelike model, the fit looks spot on.
Step 3: Set Up Your Lighting and Background
Bad lighting changes fabric colours. That leads to angry returns from customers who expected a different shade. You don't need expensive strobes, but you absolutely must manage your light.
- Use natural window light: Set up next to a large window during the morning or late afternoon. Avoid direct sunlight, which creates harsh, ugly shadows.
- Turn off indoor lights: Yellow room bulbs mixed with blue window light confuse phone cameras and ruin colours. Turn off every ceiling light and lamp.
- Use a bounce board: If one side of the garment looks dark, we place a large piece of white thermocol nearby. This bounces window light back into the shadows.
- Keep the background plain: Shoot against a solid, light-coloured wall or floor. A plain background makes it much easier to cut out the outfit.
Step 4: Take the Base Photo on Your Phone
You don't need a heavy DSLR. A modern smartphone does the job perfectly if you use the right settings.
First, wipe your phone lens with a soft cloth. Smudges create a blurry haze. Next, turn on the grid lines in your camera settings.
If you shoot a flat lay, hold your phone completely flat above the clothes. The grid keeps the phone level so the garments don't look distorted.
Tap the centre of the garment on your screen to lock focus. If the image looks too bright or dark, slide your finger up or down to fix the exposure. Take a few photos from slightly different distances so you have options.
Step 5: Turn the Photo Into a Model Shot
Once you have a clean, well-lit photo, bring in the model. We built Outfit Gen AI specifically to help sellers visualise clothes.
Open the app and use the Model Photoshoot feature. Upload your product photo and pick a model from the library. Choose models that look like your actual customers.
If you sell traditional ethnic wear in India, pick a South Asian model. Buyers need to relate to the image.
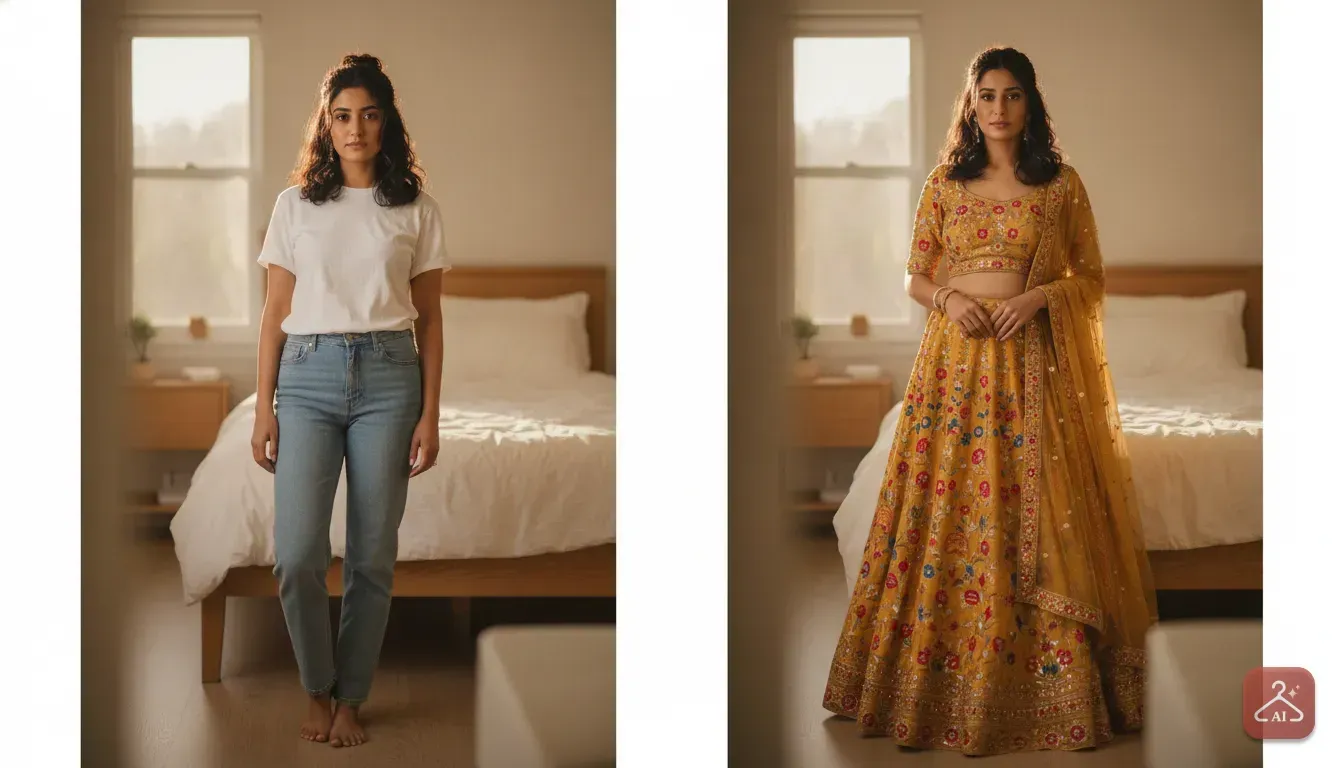
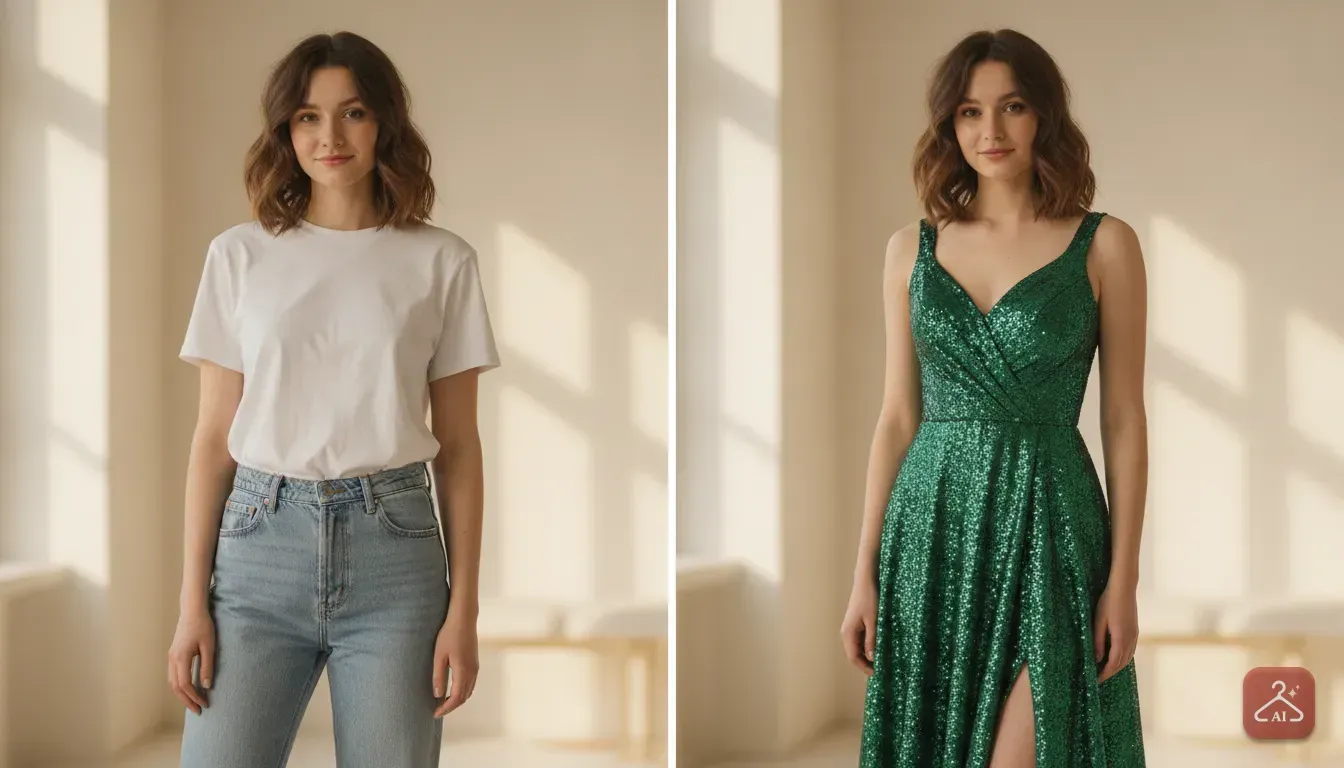
If your original photo has a messy background or shows a friend wearing the outfit in a busy room, use the Extract Outfit tool first. It pulls the clothing straight out of your photo. Then, the app applies that exact outfit onto your selected professional model.
Step 6: Edit the Background to Fit Your Brand
A catalogue photo isn't just about the model. The background sets the mood for your entire store. A high-end boutique might want a cafe setting, while a marketplace seller needs a plain grey backdrop.
Inside the app, use the AI Edit tool to swap backgrounds and tweak lighting. Choose from ready-made templates or describe the exact setting yourself. Try typing 'a brightly lit outdoor street in Mumbai during the day' or 'a minimalist studio with white walls'.
Platforms like Meesho or Amazon often demand simple, clean backgrounds. Read our specific tips on matching these rules in our guide on creating AI model photoshoots for Meesho. Tailoring the background increases your chances of getting noticed by buyers.
Step 7: Upscale for Sharp Details
Online shoppers love to zoom in. They want to inspect fabric texture, embroidery, and print quality. If your photo gets blurry when zoomed, customers hesitate.
After generating the model photo, always hit the 4K Upscale feature. This step sharpens every thread, bead, and pattern. It turns a standard generated photo into a crisp e-commerce asset that mimics an expensive camera.
Common Mistakes to Avoid
AI makes product photography incredibly fast. But simple mistakes will still ruin the final result. Keep these strict rules in mind.
- Do not cut off the edges: Keep the entire outfit in the frame. If you chop off the bottom of a kurti, the app won't know how to draw the hemline.
- Avoid extreme angles: Don't shoot from very low or high angles. Shoot straight on. Weird angles confuse the software and warp the final fit.
- Do not ignore the fabric drape: Throw a saree loosely on the floor without defining pleats, and you'll get a messy looking drape. Take two extra minutes to style the garment.
Your Next Step
You now have a clear system for making professional photos without massive studio expenses. Start small. Grab five of your best-selling outfits, prepare them well, and shoot them near a window.
Run them through the app and compare the results with your old flat lays. You'll quickly see how a lifelike model moves inventory.
We recommend batching your work. Take all base photos on Monday, then generate your model shots on Tuesday. This workflow saves hours and makes your store look totally premium.
Frequently asked questions
Do I need a professional camera to take base photos for AI?
No, a modern smartphone is completely fine. As long as you shoot in good natural light, keep your phone steady, and wipe the lens clean, the AI can work with smartphone photos easily.
Will the AI change the colour of my clothing product?
Good AI tools are designed to keep the original colours intact. However, if your base photo is taken in bad yellow lighting, the AI will use those incorrect colours. Always shoot in natural, indirect window light.
Can I use flat lay photos to generate AI model images?
Yes. You can lay the clothes flat on the floor or a table. Just make sure you shape the sleeves and waist carefully so the AI understands how the garment should fit on a real body.
How do I make sure the fabric texture is visible in AI photos?
Focus clearly on the garment when taking the base photo. After generating the AI model image, use a 4K upscaling tool to sharpen the details so customers can see the embroidery and fabric grain.

Try it yourself
Outfit Gen AI
See yourself in any outfit before you buy it.